
pfSense Installation
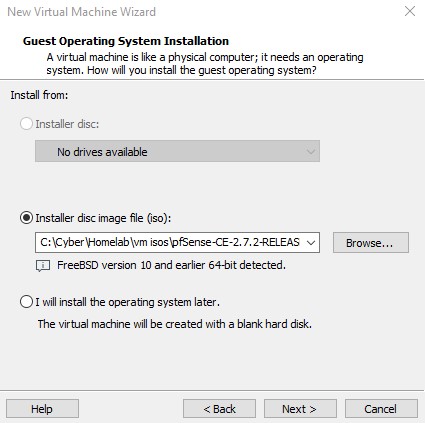
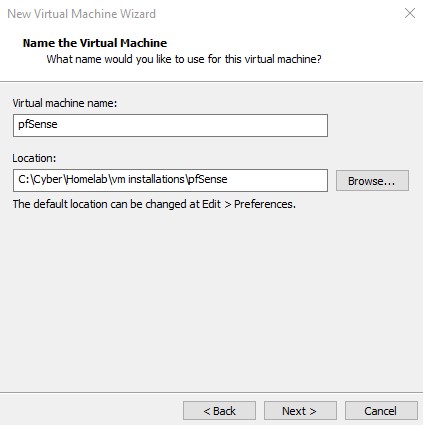
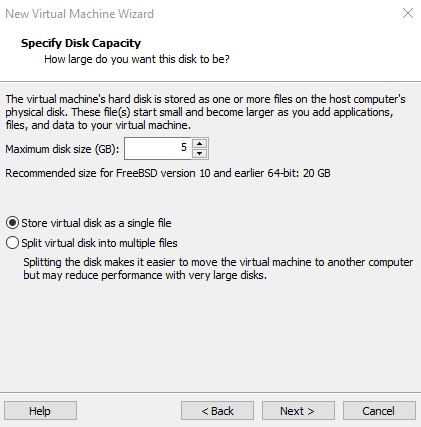
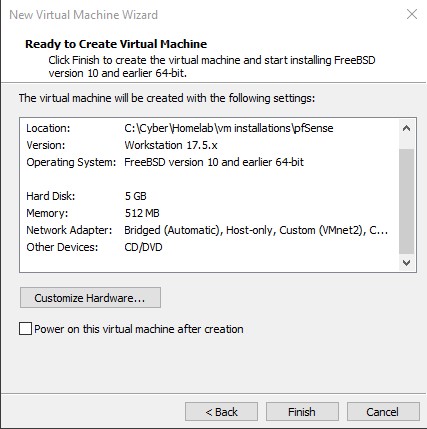
After you’ve obtained the pfSense ISO, we can begin to create the VM. Click ‘Create a New Virtual Machine’ and choose the ‘Typical’ installation type. When you get to the proper screen, choose the ‘Installer disc image file (iso)’ and find the location where you saved the ISO. Continue and rename your virtual machine along with choosing a location to where VM data will stored if you never changed the default. Change the ‘Maximum disk size (GB)’ to 5 (we can ignore recommended size here), and make sure to choose ‘Store virtual disk as a single file’.
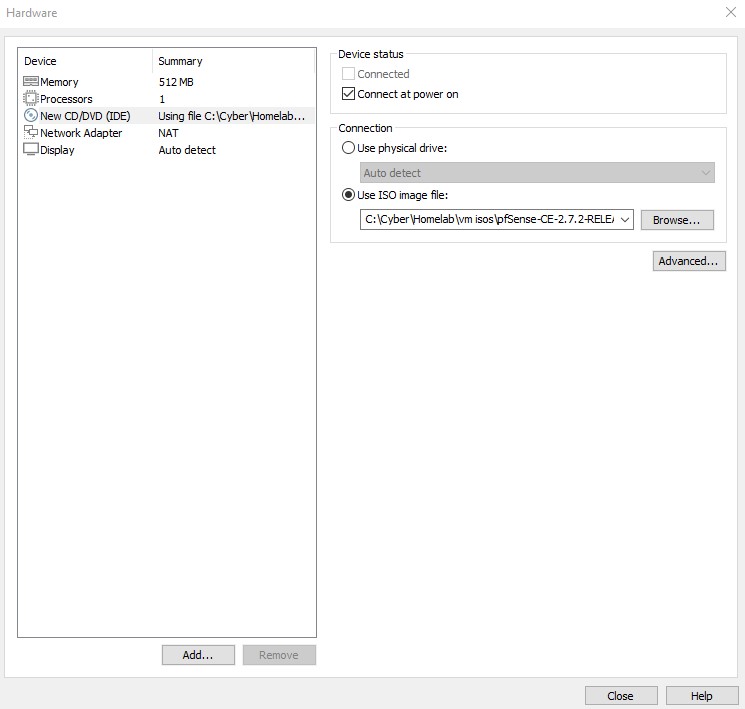
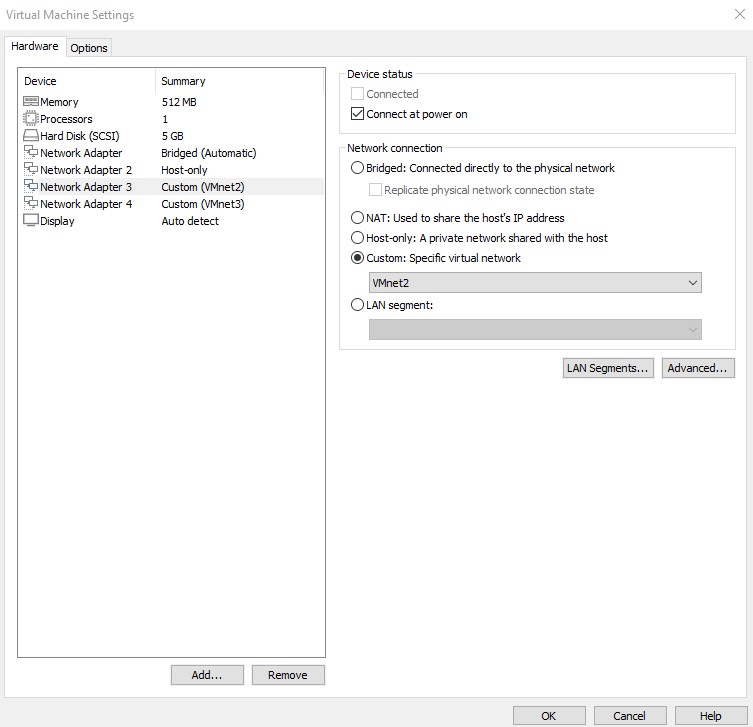
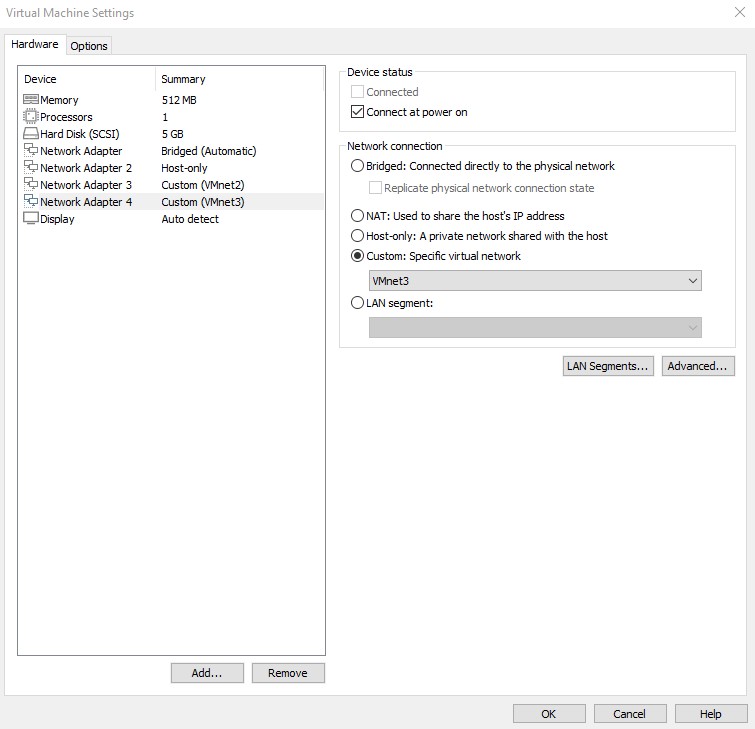
Next, we will arrive at the screen asking us if we are ready to create our virtual machine, we are not. Instead, let’s click ‘Customize Hardware’. Once there we can remove the USB and sound card by selecting them and clicking ‘Remove…’. Once removed your hardware screen should look like the image below.
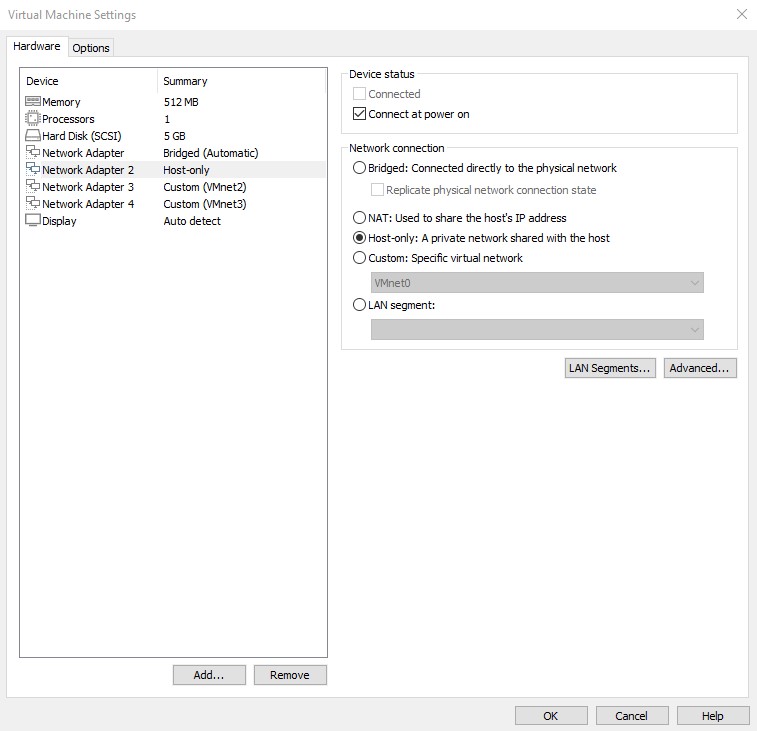
Let’s go ahead and configure the pfSense adapters. We are going to need to create 3 more adapters so click ‘Add…’ to add them. Now we can configure each as such:
-
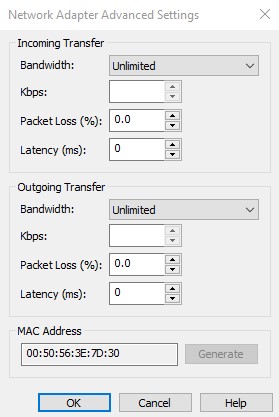
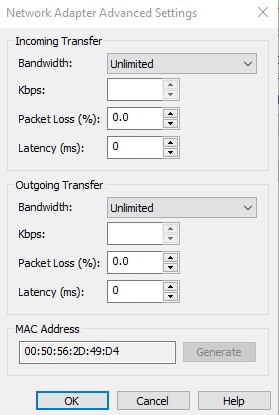
Network Adapter 1: This adapter is here by default. Make sure to change ‘NAT’ to ‘Bridged’, and have ‘Connect at power on’ selected. Click ‘Advanced…’. There is the option to generate a new MAC address, so go ahead and do that. Before closing out make sure to copy the new MAC and paste it into your note-taking application.

-
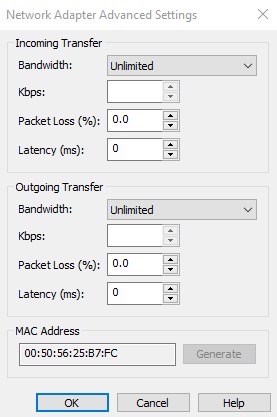
Network Adapter 2: Select ‘Host-Only’. Make sure ‘Connect at power on’ is selected. Click ‘Advanced…’ and once more generate a new MAC address.
-
Network Adapter 3: For this one we need to select ‘Custom’ and then choose ‘VMnet2’. Make sure ‘Connect at power on’ is selected. Click ‘Advanced…’ and do the same thing yet again for MAC address.

-
Network Adapter 4: Finally, we need to select ‘Custom’ and then choose ‘VMnet3’. Make sure ‘Connect at power on’ is selected. Click ‘Advanced…’ and do the same thing one last time for MAC address.
Now we can close out of the hardware selection window and go back to the ready screen. Ensure that everything looks as it should in the settings. This would be a great time to open up Obsidian or whatever note-taking application you use and add the specs & settings of your VM. It’s always best practice to note-take as you go when deploying new machines. Uncheck ‘Power on this virtual machine after creation’, and then click ‘Finish’. The VM is now created.
pfSense OS Installation
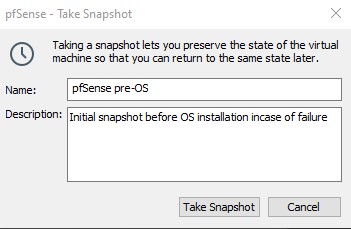
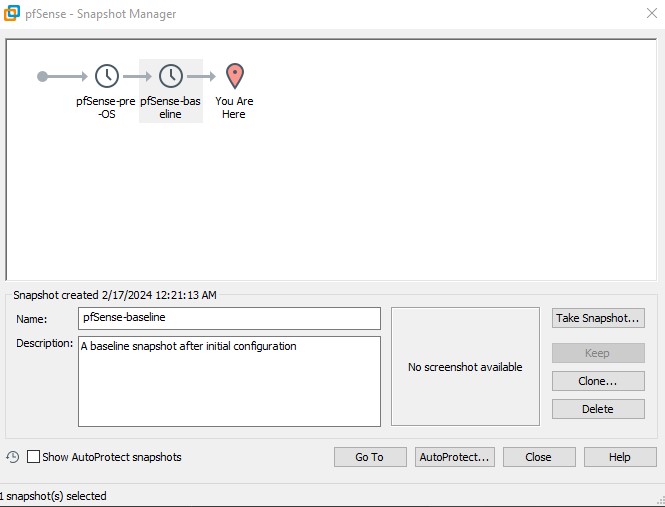
It’s always best practice to create an initial snapshot of the VM before, as well as immediately after, OS installation. Incase there is a failure in the process we can rollback to the snapshot. We can take a snapshot by right clicking the VM we want to snapshot → ‘Snapshot’ → ‘Take Snapshot…’. Name your snapshot and add an appropriate description for it.
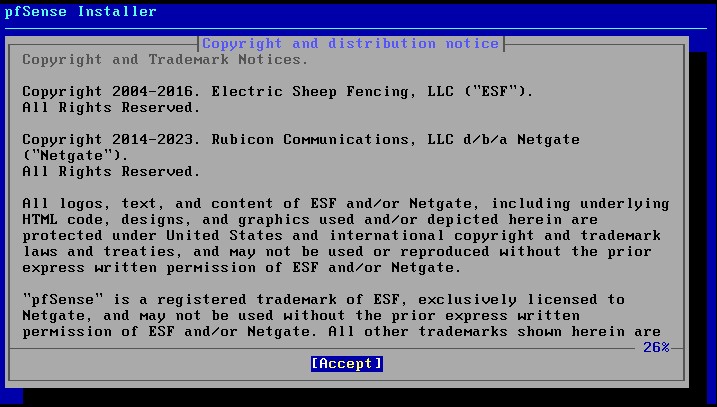
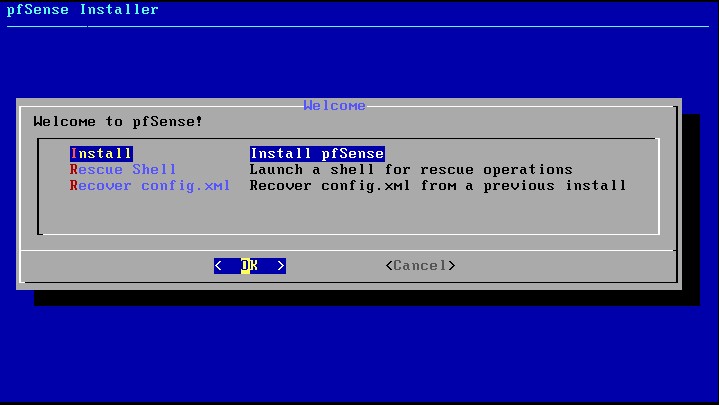
Now we can boot up the machine and install the operating system onto it. Once it is done booting from the ISO, we will be placed at the pfSense installer wizard. We need to use the arrow keys to navigate the GUI. If you need to escape from the VM environment back to your host machine then click ctrl-alt. Let’s accept the copyright agreement and hit enter. We of course want to choose the ‘Install’ option.
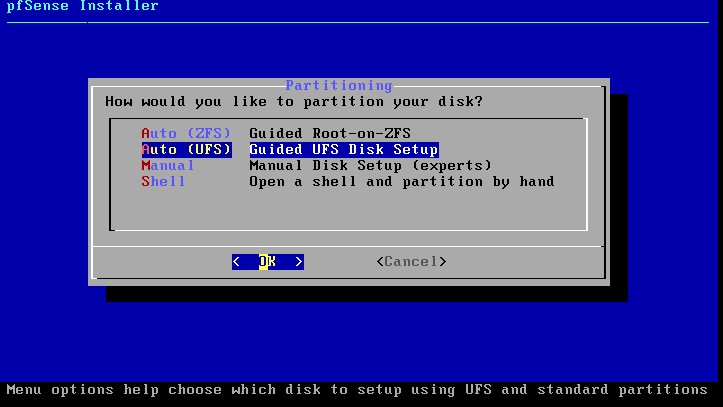
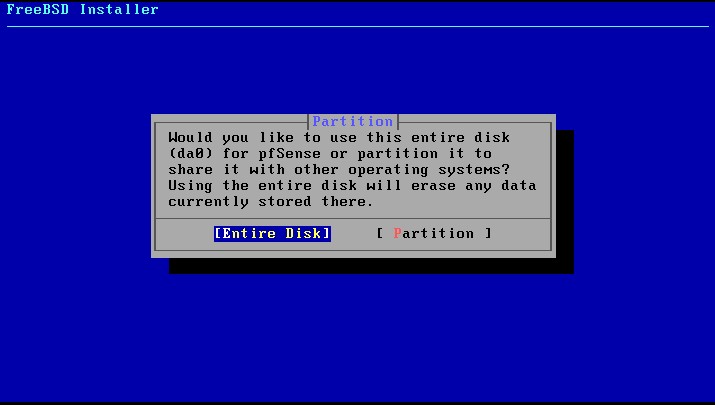
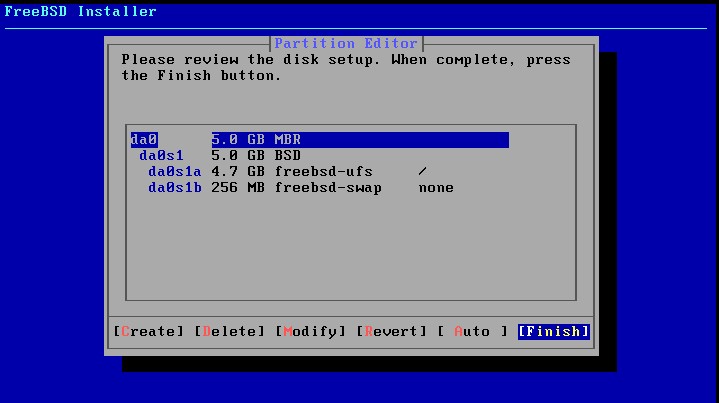
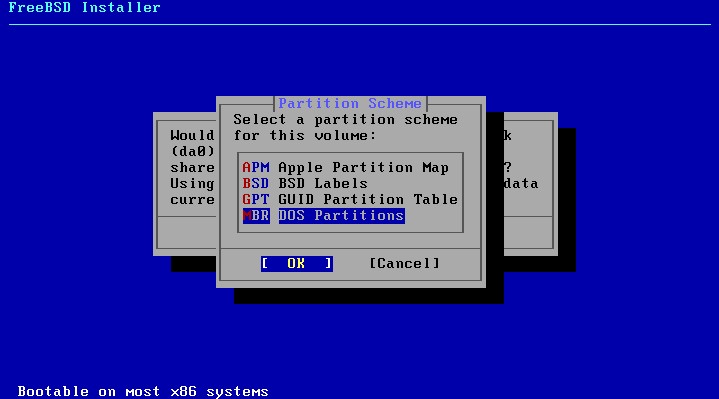
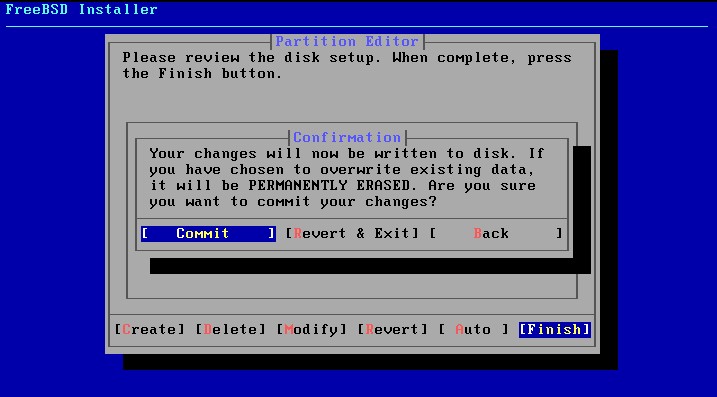
We want to use ‘Auto (UFS)’. After selection it, click through the screens as follows: ‘[Entire Disk]’ → ‘[Finish]’ → ‘MBR DOS Partitions’ → ‘[Commit]’ → ‘[Reboot]’.
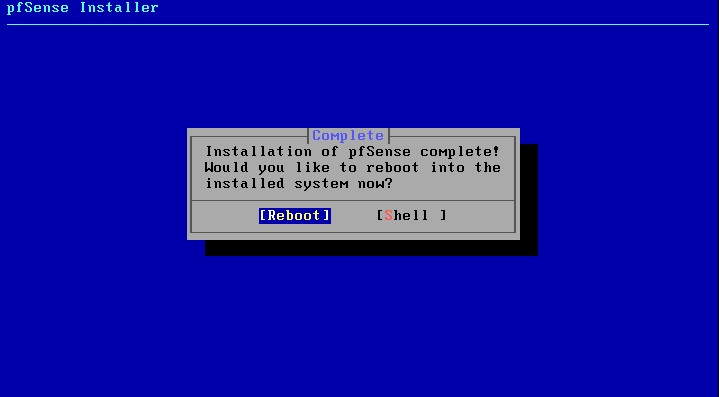
Once installation is finished and the machine is rebooted you will be greeted with the pfSense command-line interface. Before we proceed, we must power down the pfSense VM and go to the hardware settings of the machine. We no longer need the cd/dvd drive now that the OS is installed so click on it and remove it like we did with the USB and sound card from before.
pfSense Command Line
Let’s power the VM back on and at this point we can make the necessary configurations. We will need to assign the VM interfaces we created (Adapters 1, 2, 3, 4) to the logical pfSense interfaces of WAN, LAN, OPT1, and OPT2 respectively. I hope you recorded the MAC addresses of each adapter because this is where we will need them. Enter ‘1’ so that we can assign the interfaces.
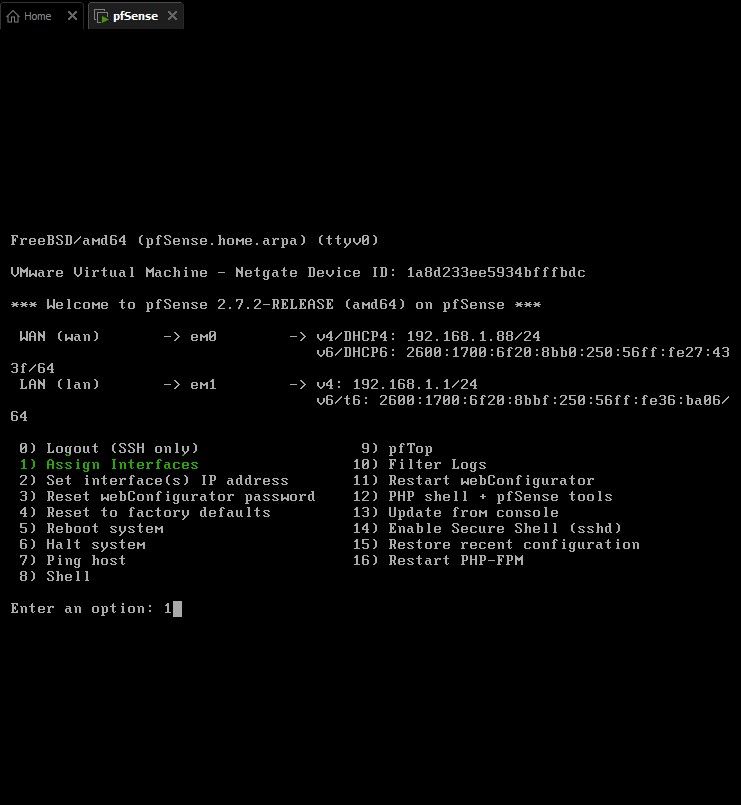
Notice that there are four options em0, em1, and em2, and em3. These interfaces correspond to the adapters we set up earlier. Take note of the MAC addresses assigned to each one.

We need to cross-reference our notes to know which one is which. For me, it would appear that the bridged adapter corresponds to em0, em1 to host-only adapter, and our custom VMnet2 adapter to em2. For you, it could be different. Just make sure that they match up correctly when we perform the setup. Once we’ve done this, follow the prompts as outlined below:
Should VLANs be set up now [y|n]? n

Enter the WAN interface name or 'a' for auto-detection (em0 em1 em2 or a): em0

Enter the LAN interface name or 'a' for autodetection NOTE: this enables full Firewalling/NAT mode. (em1 em2 a or nothing if finished): em1

Enter the Optional 1 interface name or 'a' for auto-detection (em2 a or nothing if finished): em2

Enter the Optional 2 interface name or 'a' for auto-detection (em2 a or nothing if finished): em3

The interfaces will be assigned as follows:
WAN -> em0
LAN -> em1
OPT1 -> em2
OPT2 -> em3

Do you want to proceed [y|n]? y
Once completed, this is what you should see as demonstrated by the image below.

Remember when I said we would be assigning the IP addresses of the interfaces in the previous post? Well now is the time. It would be a good time to double check and make sure DHCP is not enabled for any of the interfaces in VMWare. Enter ‘2’ so that we can set the IP addresses.
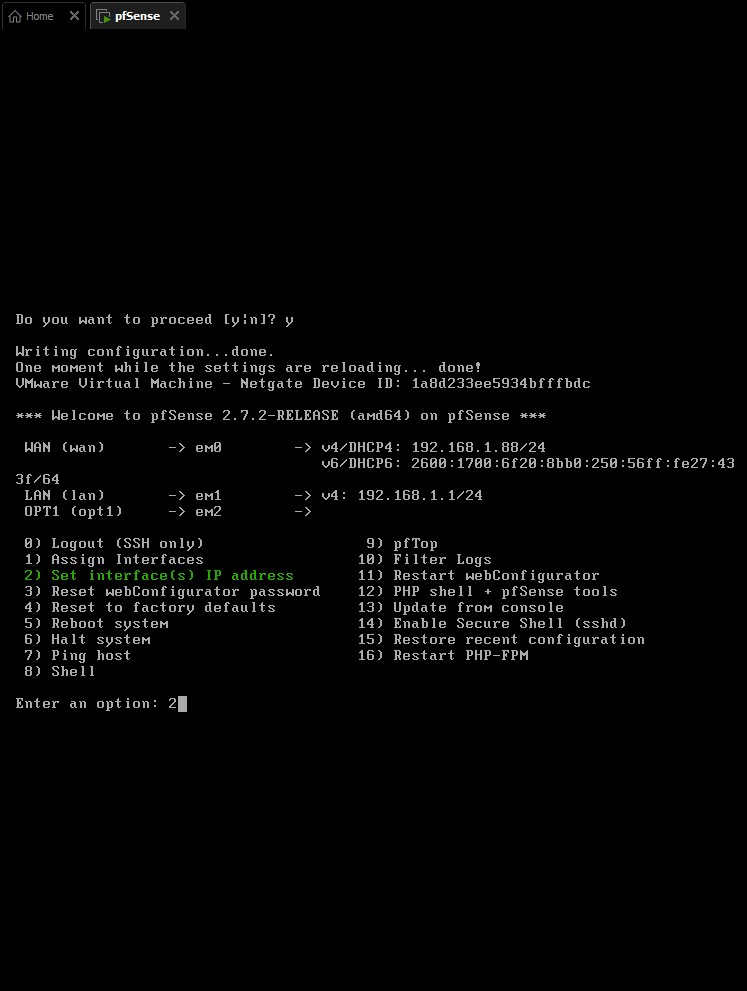
For subnet masks you could do any class-C in the range of /29 (6 usable hosts) down to /24 (254 usable hosts) depending on how many machines you know you’ll want/need in each subnet. I’d recommend just leaving it at 24 if you don’t want to worry about ever exceeding the limit cause it’s impossible you’ll ever need that many usable hosts. Do the following for each separate interface:
- LAN:
Available interfaces:
1 – WAN ([interface name] – [dhcp/dhcp6/static address configuration])
2 – LAN ([interface name])
3 – OPT1 ([interface name])
4 – OPT2 ([interface name])

Enter the number of the interface you wish to configure: 2

Configure IPv4 address LAN interface via DHCP? (y/n) n

Enter the new LAN IPv4 address: Press <ENTER> for none:
> 10.0.11.1

Subnet masks are entered as bit counts (as in CIDR notation) in pfSense
e.g. 255.255.255.0 = 24
     255.255.0.0 = 16
     255.0.0.0 = 8

Enter the new LAN IPv4 subnet bit count (1 to 31):
> 24

For WAN, enter the new LAN IPv4 upstream gateway address. For a LAN, press <ENTER> for none:
> <ENTER>

Configure IPv6 address LAN interface via DHCP? (y/n) n

Enter the new LAN IPv6 address. Press <ENTER> for none: >
 <ENTER>

Do you want to enable the DHCP server on LAN? (y/n) y

Enter the start address of the IPv4 client address range: 10.0.11.10
Enter the end address of the IPv4 client address range: 10.0.11.254

Disabling IPv6 DHCPD… Do you want to revert to HTTP as the webConfigurator protocol? (y/n) n

Please wait while the changes are saved to LAN…
Reloading filter…
Reloading routing configuration…
DHCPD…

The IPv4 LAN address has been set to 10.0.11.1/24 You can now access the webConfigurator by opening the following URL in your web browser:
https://10.0.11.1
- OPT1:
Available interfaces:
1 – WAN ([interface name] – [dhcp/dhcp6/static address configuration])
2 – LAN ([interface name] – static)
3 – OPT1 ([interface name])
4 – OPT2 ([interface name])

Enter the number of the interface you wish to configure: 3

Configure IPv4 address OPT1 interface via DHCP? (y/n) n

Enter the new OPT1 IPv4 address: Press <ENTER> for none:
> 10.0.12.1

Subnet masks are entered as bit counts (as in CIDR notation) in pfSense
e.g. 255.255.255.0 = 24
     255.255.0.0 = 16
     255.0.0.0 = 8

Enter the new OPT1 IPv4 subnet bit count (1 to 31):
> 24

For WAN, enter the new OPT1 IPv4 upstream gateway address. For a LAN, press <ENTER> for none:
> <ENTER>

Configure IPv6 address OPT1 interface via DHCP? (y/n) n

Enter the new OPT1 IPv6 address. Press <ENTER> for none: >
 <ENTER>

Do you want to enable the DHCP server on OPT1? (y/n) y

Enter the start address of the IPv4 client address range: 10.0.12.10
Enter the end address of the IPv4 client address range: 10.0.12.254

Disabling IPv6 DHCPD… Do you want to revert to HTTP as the webConfigurator protocol? (y/n) n

Please wait while the changes are saved to OPT1…
Reloading filter…
Reloading routing configuration…
DHCPD…

The IPv4 OP1 address has been set to 10.0.12.1/24 You can now access the webConfigurator by opening the following URL in your web browser:
https://10.0.12.1
- OPT2:
Available interfaces:
1 – WAN ([interface name] – [dhcp/dhcp6/static address configuration])
2 – LAN ([interface name] – static)
3 – OPT1 ([interface name] - static)
4 - OPT2 ([interface name])

Enter the number of the interface you wish to configure: 3

Configure IPv4 address OPT2 interface via DHCP? (y/n) n

Enter the new OPT2 IPv4 address: Press <ENTER> for none:
> 10.0.13.1

Subnet masks are entered as bit counts (as in CIDR notation) in pfSense
e.g. 255.255.255.0 = 24
     255.255.0.0 = 16
     255.0.0.0 = 8

Enter the new OPT2 IPv4 subnet bit count (1 to 31):
> 24

For WAN, enter the new OPT2 IPv4 upstream gateway address. For a LAN, press <ENTER> for none:
> <ENTER>

Configure IPv6 address OPT2 interface via DHCP? (y/n) n

Enter the new OPT2 IPv6 address. Press <ENTER> for none: >
 <ENTER>

Do you want to enable the DHCP server on OPT2? (y/n) y

Enter the start address of the IPv4 client address range: 10.0.13.10
Enter the end address of the IPv4 client address range: 10.0.13.254

Disabling IPv6 DHCPD… Do you want to revert to HTTP as the webConfigurator protocol? (y/n) n

Please wait while the changes are saved to OPT2…
Reloading filter…
Reloading routing configuration…
DHCPD…

The IPv4 OP1 address has been set to 10.0.12.1/24 You can now access the webConfigurator by opening the following URL in your web browser:
https://10.0.13.1
After doing this process for LAN, OPT1, and OPT2 you should now see the below screen back at the starting command line. We now see that our IP addresses have been set correctly and DHCP has assigned us an IP address for WAN. Everything should be in working order now!

There’s still two important steps to take before we call it done. First, lets try some quick ping, nslookup, and curl commands to see if we actually have a connection. Enter ‘8’ and then enter these commands:
ping -c 4 8.8.8.8
nslookup www.google.com
curl -I https://www.google.com
If every command goes through successfully, then congrats, you’re online! Let’s power off the machine and take a quick new snapshot of the machine.
| We will move on to configuring the network services and firewall rules in pfSense’s webConfigurator. You can find the next part, ‘VMWare Pro Homelab | Services & Firewall Setup’, in the [blog] section of this site. |