
VMWare Preferences
After you have downloaded and installed VMWare, you will see the ‘Edit’ dropdown menu in the toolbar at the top. At the bottom of edit is ‘Preferences…’. Here we can potentially change some settings. If you wish to select a different directory for your VM installations then you can go ahead and change it under ‘Default location for virtual machines’ on the ‘Workspace’ tab.

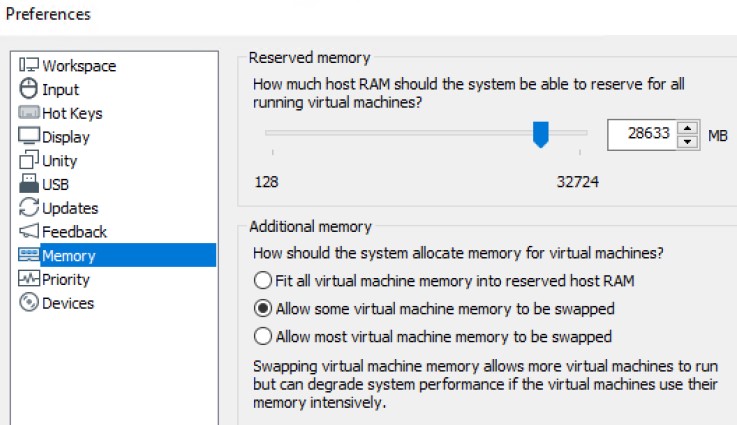
If we click on the ‘Memory’ tab, you can select how much reserved memory allocation you wish to use for VMs. If you have the recommended amount of memory then max out the the reserved memory allocation for VMs leaving at least 4GB for your host machine. If you’re still trying to complete this lab and you’re under the minimum requirements, then you can select ‘Allow most virtual machine memory to be swapped’ as well as lowering the memory allocations for each machine when creating them. Keep in mind this will tank performance heavily.
Virtual Network Editor
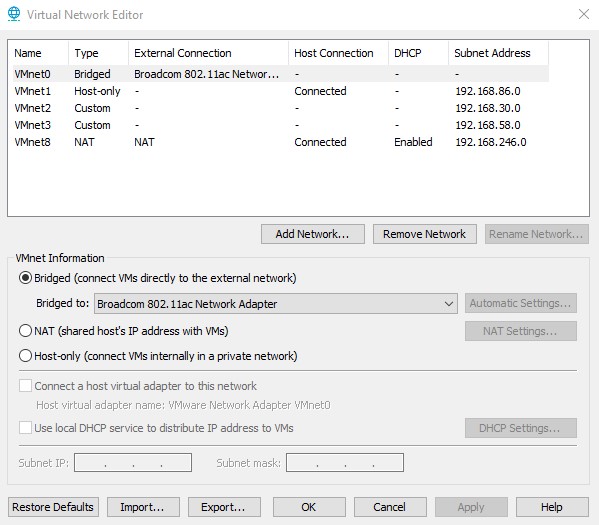
In Workstation Pro, we have the option to use the virtual network editor to configure our custom virtual networks. This feature only exists under Pro, so if you haven’t obtained it yet then do so now. The VNE can be found under the edit dropdown menu. Permissions will have to be granted to allow the application to make changes to network settings. Click ‘Change Settings’ and the click yes when prompted.
By default, VMWare will set VMnet0 to a bridged connection that automatically connects with any network interface in your home network. We could configure the auto settings and uncheck whichever adapter we don’t want to be used, but we will not be doing this. We can configure it manually to whichever device we would like to use.
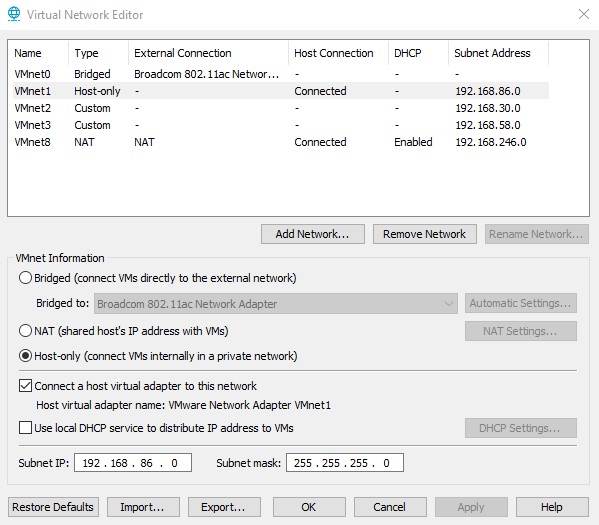
Now we need to create three additional virtual networks, so click ‘Add Network’ and add all of them. For VMnet 1-3 these are the configurations we want:
- VMnet1: Leave as ‘Host-only’ and uncheck the box for ‘Use local DHCP service to distribute IP address to VMs’. Don’t worry about subnet IPs right now, we will set those in pfSense later.
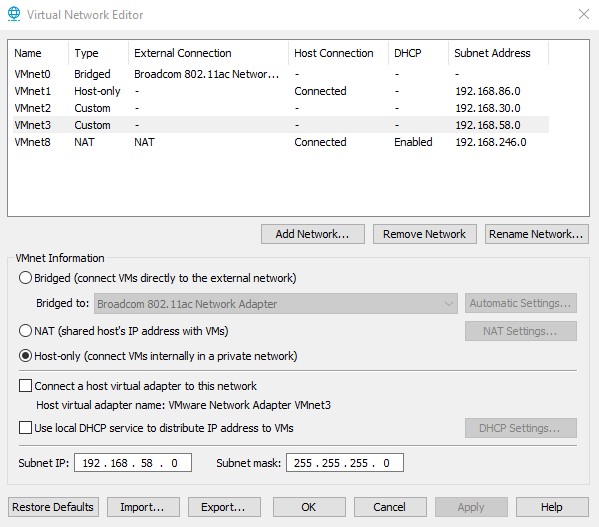
- VMnet2 & 3: These should have the same configuration. Set as ‘Host-only’ and uncheck the boxes for ‘Connect a host virtual adapter to this network’ and ‘Use local DHCP service to distribute IP address to VMs’.
VMnet1 Host Virtual Adapter
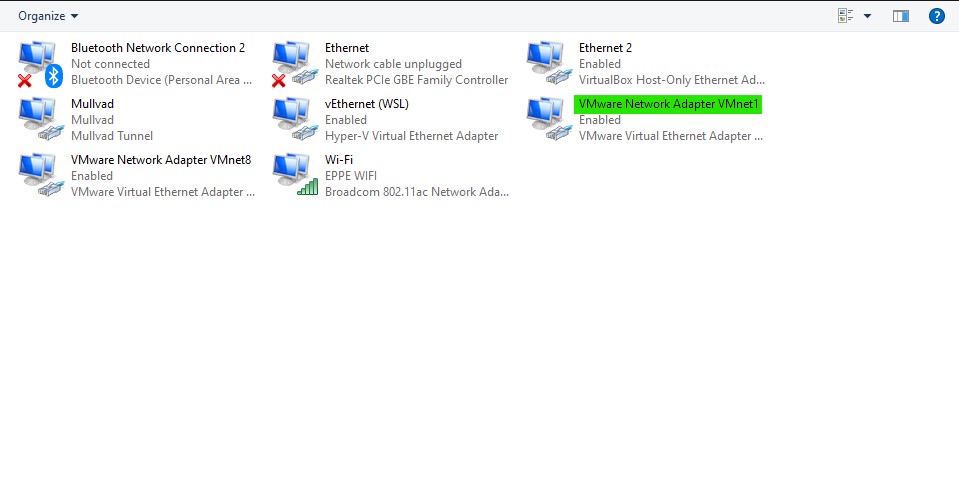
Now we need to assign the IP for the host virtual adapter of VMnet1. Hold win-R on your keyboard to bring up the run window. Input ‘ncpa.cpl’ and click enter. Find the VMnet1 adapter and right click, select ‘Properties’. Go to ipv4 and select ‘Properties’ once more.

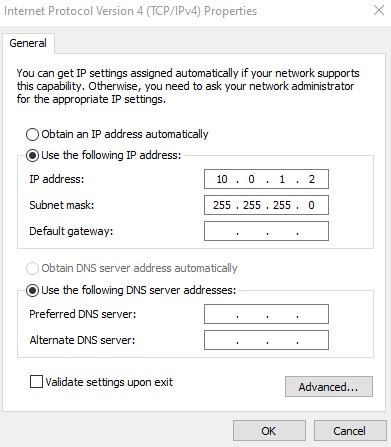
Here we will configure the IP address for the adapter as ‘10.0.1.2’. Make sure it looks identical to what I have below. Keep the subnet mask as is, and make sure that the DNS entries remain blank.
| Congrats, we’ve done all of the preliminary work in VMWare! We can now move onto setting up the pfSense router/firewall. You can find the next post, ‘VMWare Pro Homelab | pfSense Setup’, in the [blog] section of this site. |